首先,写这个的目的是为了学习一下markdown语法,顺便再熟练一下微服务环境的搭建
k8s单master环境搭建
详细步骤见 kuboard.cn
我这里补充一下细节供参考,我使用的是vmware虚拟机,本机内存16G,拿出8G的内存来装k8s,操作系统centos
1.首先使用vmware安装好centos,我这里用户名ranger密码1234,root密码1234,主要是为了好记,建议大家也这样,同时网络为NAT模式,ip地址使用固定地址,这个很重要,强调一下,我的地址为192.168.232.60和192.168.232.62
2.检查hostname和cpu,hostname使用hostnamectl set-hostname xxx 命令指定,cpu在安装centos的时候指定,没双核的关掉centos再指定双核也可以,这里暂时hostname可随便指定,我用的grail临时替代
3.我的操作系统版本centos stream 8,安装好centos之后su root,所有命令直接用root用户
4.安装containerd/kubelet/kubeadm/kubectl,在网页上把方框勾上,如图
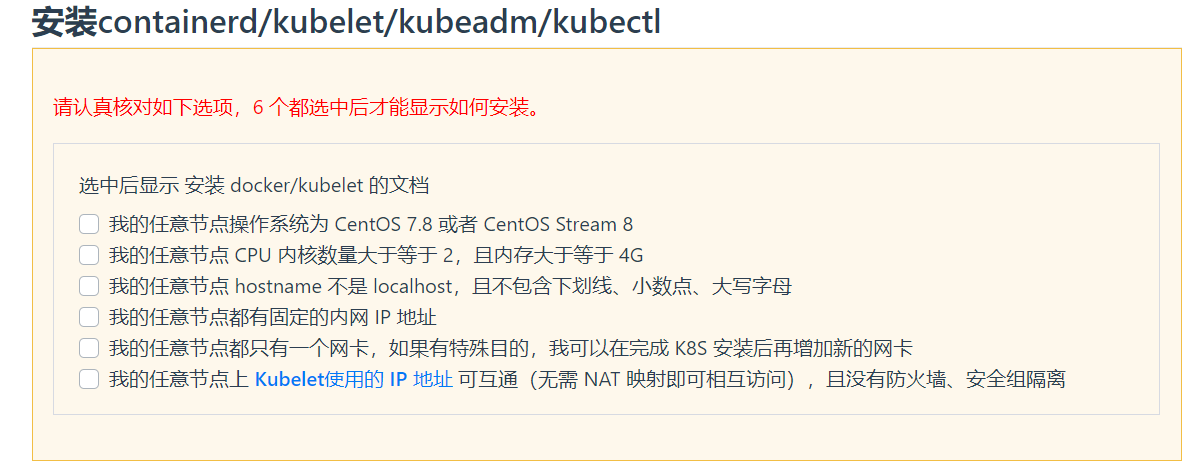
勾完方框之后,如图
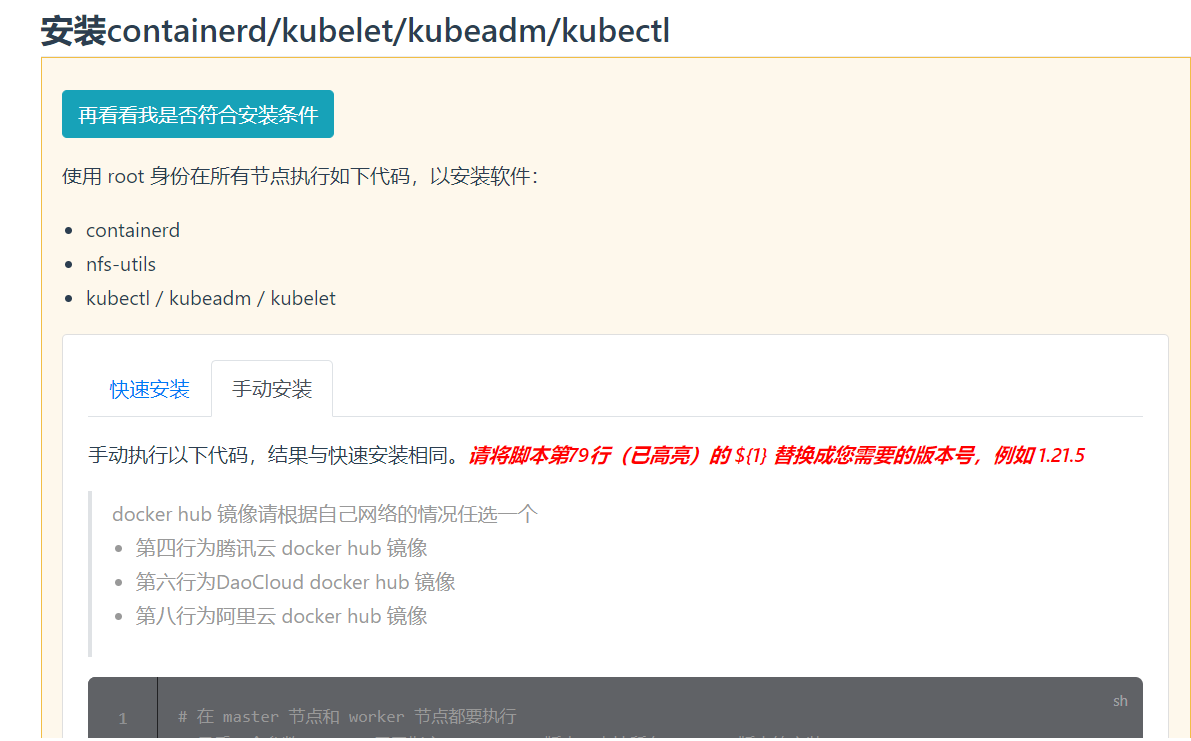
但我不建议在这里使用快速安装,因为现在的快速安装不会安装docker,而当我们不熟练k8s的时候,docker还是很有用的,比方说配置加速器很方便,使用自己的docker register也很方便
我们先安装docker,选择教程 菜鸟网络
安装好docker之后设置好自启动和免sudo操作(不会自行百度)
然后选择图2画面中的手动安装
命令行输入: export REGISTRY_MIRROR=https://registry.cn-hangzhou.aliyuncs.com
复制如图所示的脚本为install.sh

并修改(是为了防止container.io重装而出错)
注释掉28行的 yum remove -y containerd.io 和 35行的 yum install -y containerd.io-1.4.3(就是在28行和35行前加上#号,地球人都知道啊)
32行的https://download.docker.com/linux/centos/docker-ce.repo 替换成 http://mirrors.aliyun.com/docker-ce/linux/centos/docker-ce.repo
然后chmod +x install.sh 之后执行install.sh脚本 ./install.sh,我修改之后的install.sh如下:
#!/bin/bash

# 在 master 节点和 worker 节点都要执行

# 安装 containerd
# 参考文档如下
# https://kubernetes.io/docs/setup/production-environment/container-runtimes/#containerd

cat <<EOF | sudo tee /etc/modules-load.d/containerd.conf
overlay
br_netfilter
EOF

sudo modprobe overlay
sudo modprobe br_netfilter

# Setup required sysctl params, these persist across reboots.
cat <<EOF | sudo tee /etc/sysctl.d/99-kubernetes-cri.conf
net.bridge.bridge-nf-call-iptables  = 1
net.ipv4.ip_forward                 = 1
net.bridge.bridge-nf-call-ip6tables = 1
EOF

# Apply sysctl params without reboot
sysctl --system

# 卸载旧版本
#yum remove -y containerd.io

# 设置 yum repository
yum install -y yum-utils device-mapper-persistent-data lvm2
yum-config-manager --add-repo http://mirrors.aliyun.com/docker-ce/linux/centos/docker-ce.repo

# 安装 containerd
#yum install -y containerd.io-1.4.3

mkdir -p /etc/containerd
containerd config default > /etc/containerd/config.toml

sed -i "s#k8s.gcr.io#registry.aliyuncs.com/k8sxio#g"  /etc/containerd/config.toml
sed -i '/containerd.runtimes.runc.options/a\ \ \ \ \ \ \ \ \ \ \ \ SystemdCgroup = true' /etc/containerd/config.toml
sed -i "s#https://registry-1.docker.io#${REGISTRY_MIRROR}#g"  /etc/containerd/config.toml


systemctl daemon-reload
systemctl enable containerd
systemctl restart containerd


# 安装 nfs-utils
# 必须先安装 nfs-utils 才能挂载 nfs 网络存储
yum install -y nfs-utils
yum install -y wget

# 关闭 防火墙
systemctl stop firewalld
systemctl disable firewalld

# 关闭 SeLinux
setenforce 0
sed -i "s/SELINUX=enforcing/SELINUX=disabled/g" /etc/selinux/config

# 关闭 swap
swapoff -a
yes | cp /etc/fstab /etc/fstab_bak
cat /etc/fstab_bak |grep -v swap > /etc/fstab

# 配置K8S的yum源
cat <<EOF > /etc/yum.repos.d/kubernetes.repo
[kubernetes]
name=Kubernetes
baseurl=http://mirrors.aliyun.com/kubernetes/yum/repos/kubernetes-el7-x86_64
enabled=1
gpgcheck=0
repo_gpgcheck=0
gpgkey=http://mirrors.aliyun.com/kubernetes/yum/doc/yum-key.gpg
       http://mirrors.aliyun.com/kubernetes/yum/doc/rpm-package-key.gpg
EOF

# 卸载旧版本
yum remove -y kubelet kubeadm kubectl

# 安装kubelet、kubeadm、kubectl
# 将 ${1} 替换为 kubernetes 版本号,例如 1.20.1
yum install -y kubelet-${1} kubeadm-${1} kubectl-${1}

crictl config runtime-endpoint /run/containerd/containerd.sock

# 重启 docker,并启动 kubelet
systemctl daemon-reload
systemctl enable kubelet && systemctl start kubelet

containerd --version
kubelet --version
5.第四步成功之后关掉虚拟机,复制成两分,一份命名master,一份命名node1,先打开node1,用secureCRT登陆,su root,然后uuidgen 复制得到的uuid,然后vi /etc/sysconfig/network-scripts/ifcfg-ens33
替换uuid为你刚才得到的uuid,修改ip为62,然后hostnamectl set-hostname node1,然后nmcli c reload,这一步是为了防止主机和node1 uuid和ip重复
6.剩下的就是照抄 kuboard.cn ,一马平川了,安装好之后照教程安装kuboard 2.x,之所以是2是因为3对我们没必要,而且你没那么容易掌握3,我是反复装了10几遍之后才明白,之后换成2
7.然后按教程打开,我的界面如图:
